Learn how to attach and detach a BOSS ATV snowplow with this step-by-step guide. Follow best practices for safe, efficient snowplow installation. |
QUICK ANSWER |
How do you attach a snowplow to an ATV?To attach a BOSS ATV snowplow:
Continue reading for more information. |
How To Attach a BOSS ATV Snowplow |
Note: The vehicle must be running before starting this procedure. |
|
1. Activate the FLOAT feature on your plow controller.
3. Set the parking brake.
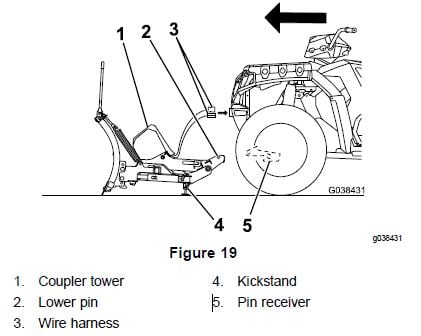
5. Remove the electrical-plug dust-covers and connect the plow wire harness to the vehicle wire harness (Figure 19).
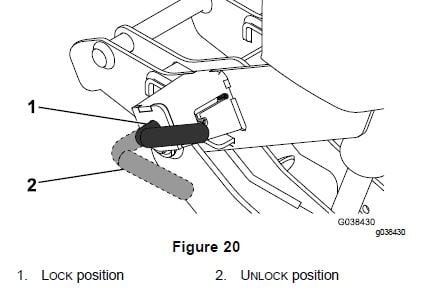
8. Ensure that both coupler spring pins have fully engaged the coupler (Figure 20). |
How To Detach a BOSS ATV Snowplow |
Note: The vehicle must be running before starting this procedure. Set the parking brake. If your vehicle does not have a parking brake, chock the wheels. |
|
1. Activate the FLOAT feature on the plow controller.
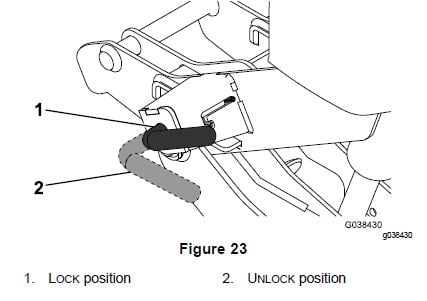
3. While putting upward pressure on the coupler handle, turn the levers on the couplers to the OFF position (Figure 23).
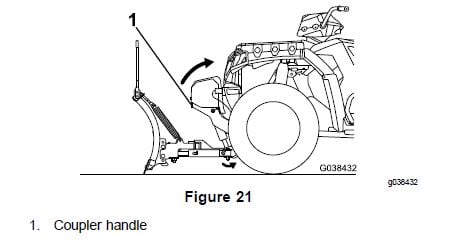
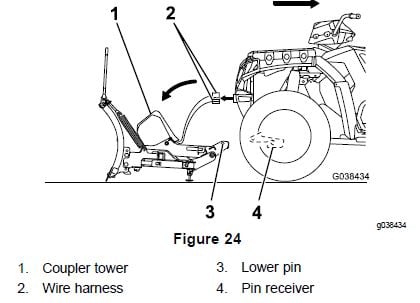
4. Using the coupler handle, lower the coupler tower completely (Figure 24).
5. Disconnect the plow wire harness from the vehicle wire harness and secure the |
ATV Snowplow Attachment Checklist |
|
✓ Vehicle running ✓ FLOATAT mode activated ✓ Couplers engaged ✓ Wiring harness connected ✓ Spring pins locked ✓ Kickstand raised ✓ Final inspection completed |
FAQ |
How do you attach a BOSS ATV snowplow?Follow the mounting procedure by aligning the ATV with the plow, engaging the couplers, connecting the electrical harness, and securing the spring pins. Can you leave an ATV snowplow attached all winter?Yes. Many operators leave their snowplow attached throughout the season. However, inspect all electrical connections and moving components regularly. Why won't my ATV snowplow connect properly?Common causes include misaligned couplers, disconnected wiring harnesses, damaged spring pins, or debris preventing proper engagement. How long does it take to attach an ATV snowplow?Most experienced operators can attach a BOSS ATV snowplow in just a few minutes. What safety precautions should I take when attaching a snowplow?Always engage the parking brake, keep the vehicle running during the procedure, and ensure all couplers and electrical connections are fully secured before operation. |
Before the season starts, follow this simple process for attaching your plow, and when the season is over.